
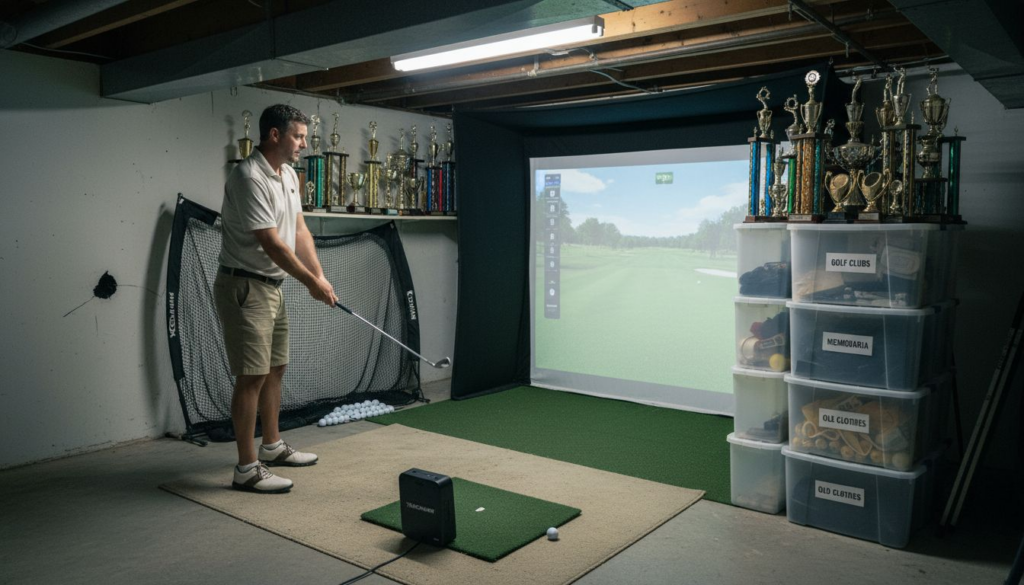
Trying to set up a golf simulator in a small room can feel overwhelming. Every inch matters when you want to practice your swing at home without losing valuable living space. The risk of wasted money or cramped, uncomfortable layouts is real if you jump in without guidance.
The good news is that you can create a powerful and enjoyable golf simulator experience—no matter how tight the room—by making smart equipment choices and clever layout decisions. From choosing compact gear to integrating multi-use features, there are practical ways to get the most out of every square foot.
Get ready to discover hands-on solutions that will let you enjoy realistic golf training and keep your space functional. Each tip ahead is designed to help you avoid common pitfalls and turn even a modest room into a spot that both looks great and plays even better.
Table of Contents
- Choose a Compact Golf Simulator Setup
- Optimize Room Layout for Multi-Use
- Install Retractable Screens and Nets
- Select Space-Efficient Projectors and Sensors
- Utilize Custom Storage Solutions
- Incorporate Smart Home Features for Automation
- Maximize Lighting for Small Spaces
Quick Summary
| Takeaway | Explanation |
|---|---|
| 1. Maximize Compact Space | Choose all-in-one systems and portable equipment to optimize room usage for golf simulations. |
| 2. Flexible Multi-Use Design | Design rooms that can pivot between golf practice and living functionalities using movable furniture and adaptable setups. |
| 3. Invest in Smart Automation | Use smart home technology to control lighting and equipment, enhancing convenience and usability for your simulator space. |
| 4. Select Short Throw Projectors | Short throw projectors and compact sensors are essential for saving space without sacrificing performance. |
| 5. Prioritize Effective Storage | Create custom storage solutions to organize equipment efficiently, keeping the area tidy and functional. |
1. Choose a Compact Golf Simulator Setup
Designing a golf simulator setup for a small space requires strategic planning and smart equipment selection. The key is maximizing every square inch while maintaining a realistic and immersive golfing experience.
Compact golf simulator setups demand careful consideration of room dimensions and equipment choices. When working with limited space, homeowners must select space efficient gear that delivers high performance without occupying excessive room. This means prioritizing all in one systems, portable launch monitors, and adaptable projection equipment.
Measuring your available space is the critical first step. You will need to assess room width, depth, and ceiling height to ensure adequate swing clearance. Most compact setups require a minimum of 10 feet wide, 12 feet deep, and 8.5 feet high to accommodate a full golf swing safely. Shorter drivers and carefully angled positioning can help maximize usable space.
Consider investing in launch monitors and projectors specifically designed for confined areas. Modern technology offers compact solutions that deliver remarkable accuracy and performance metrics without demanding massive room requirements. Look for systems with shorter club allowances and portable design elements.
Key Compact Setup Strategies:
• Use all in one simulator systems
• Select shorter golf clubs for restricted spaces
• Choose portable launch monitors
• Angle your setup strategically
• Prioritize vertical projection screens
Pro tip: Measure your room three times and plan your simulator layout carefully to avoid costly equipment placement mistakes.
2. Optimize Room Layout for Multi-Use
Creating a golf simulator space that serves multiple functions requires intelligent design and strategic planning. The goal is to transform your room into a flexible environment that seamlessly transitions between golf practice and everyday living.
Multi-use room layouts demand creative solutions that maximize space functionality. This means incorporating furniture and equipment that can be easily moved, hidden, or adapted to different uses. Think retractable screens, foldable golf nets, and portable hitting mats that can quickly disappear when not in use.
Key strategies for optimizing your multi-use golf simulator room include positioning your setup off center or at an angle. This approach preserves more usable floor space and allows for additional furniture or activities. Wall mounted shelving, convertible seating, and modular storage solutions can help maintain the room flexibility.
Flexible Room Design Techniques:
• Use motorized retractable projection screens
• Install fold away golf equipment enclosures
• Select portable hitting mats
• Implement wall mounted storage solutions
• Choose furniture with multiple functions
Smart home automation can further enhance your room versatility. Motorized screens and automated equipment deployment systems allow you to transform the space with minimal effort, maintaining both aesthetic appeal and practical functionality.
Pro tip: Invest in lightweight mobile furniture and equipment with quick setup and breakdown capabilities to maximize your room flexibility.
3. Install Retractable Screens and Nets
Retractable screens and nets represent the ultimate solution for golf simulator spaces that need to serve multiple functions. These innovative systems allow you to transform your room instantly by concealing golf equipment when not in active use.
Motorized retractable technology offers homeowners an elegant way to maximize room functionality. High quality woven polyester screens can disappear into ceiling housings, creating a clean aesthetic and preserving floor space. The key is selecting systems that deploy quickly and store compactly.
When choosing retractable screens, consider factors like material durability, ease of installation, and mechanism smoothness. Lightweight nets made from specialized impact resistant fabrics provide protection while remaining nearly invisible when retracted. Some advanced systems integrate smart home controls, allowing you to deploy or hide screens with a simple voice command or smartphone tap.
Retractable Screen Selection Criteria:
• Choose impact resistant polyester materials
• Verify ceiling mounting compatibility
• Check motorized deployment mechanisms
• Evaluate storage footprint
• Consider smart home integration options
The primary advantage of these systems is their ability to convert spaces seamlessly. Your golf simulator area can transform from an active practice zone to a pristine living space in seconds, maintaining both functionality and aesthetic appeal.
Pro tip: Measure your ceiling height and room dimensions carefully before purchasing a retractable screen to ensure smooth installation and optimal performance.
4. Select Space-Efficient Projectors and Sensors
Choosing the right projectors and sensors can dramatically transform your home golf simulator experience while preserving precious square footage. The key is selecting technology that delivers maximum performance with minimal spatial requirements.
Modern golf simulator technology offers incredible solutions for compact spaces. Short throw projectors and camera based launch monitors represent game changing innovations for homeowners with limited room dimensions. These compact devices provide accurate tracking and immersive visuals without demanding extensive floor space.
Short throw projectors represent a critical breakthrough for small room setups. Unlike traditional projectors requiring significant distance from the screen, these devices can be mounted extremely close to the projection surface. Wall or ceiling mounting further reduces floor clutter and preserves valuable room real estate.
Optimal Projector and Sensor Selection Criteria:
• Prioritize short throw projection technology
• Select camera based launch monitors
• Consider ceiling or wall mounting options
• Verify tracking accuracy at close ranges
• Evaluate compact sensor footprints
• Check compatibility with simulator software
When evaluating launch monitors, focus on camera based systems that provide precise ball and club tracking without requiring massive setup zones. Modern sensors can capture detailed swing metrics using minimal physical space, making them perfect for home environments with spatial constraints.
Pro tip: Measure your available vertical and horizontal clearance before purchasing projectors or sensors to ensure seamless installation and optimal performance.
5. Utilize Custom Storage Solutions
Custom storage solutions transform golf simulator spaces from cluttered to streamlined, ensuring every piece of equipment has a strategic home. The right storage approach can make a compact room feel organized and professional.
Integrating specialized storage for golf equipment allows you to maximize space efficiency while maintaining a clean aesthetic. Built-in cabinets, under-seat compartments, and dedicated shelving units can conceal clubs, balls, sensors, and accessories when not in active use.
The goal is creating multifunctional storage that seamlessly blends with your room design. Consider modular solutions that can be customized to fit your specific equipment dimensions. Wall mounted racks, pull out drawers, and vertical storage systems can dramatically reduce floor clutter while keeping everything accessible.
Strategic Storage Design Elements:
• Integrate concealed equipment cabinets
• Use vertical wall mounting techniques
• Select modular storage components
• Create dedicated accessory compartments
• Design with equipment dimensions in mind
• Prioritize quick access and easy organization
When designing storage, think beyond traditional approaches. Magnetic tool strips, retractable hanging systems, and custom built shelving can transform unused wall or corner spaces into efficient storage zones. The key is creating solutions that are both visually appealing and supremely functional.
Pro tip: Measure your golf equipment precisely and sketch potential storage layouts before purchasing or building custom solutions to ensure perfect fit and maximum efficiency.
6. Incorporate Smart Home Features for Automation
Smart home automation transforms golf simulator spaces from simple practice areas into sophisticated multifunctional environments. With the right technology, you can create seamless experiences that enhance both functionality and convenience.
Modern home automation systems offer remarkable flexibility for golf enthusiasts working with limited space. Imagine controlling your entire simulator environment through smartphone apps or voice commands. Motorized screens can deploy automatically, lighting can adjust to perfect simulation conditions, and audio systems can create immersive practice environments with minimal manual intervention.
The key to successful smart home integration lies in selecting compatible technologies that work together smoothly. Look for systems that can control projection screens, manage lighting intensity, adjust room temperature, and even track your practice sessions without requiring constant manual input.
Smart Automation Features for Golf Simulators:
• Motorized retractable projection screens
• Voice activated equipment deployment
• Smartphone controlled lighting scenes
• Automated audio environment settings
• Sensor driven climate control
• Remote performance tracking systems
Integration goes beyond simple convenience. Smart home features can help you maximize limited space by allowing rapid transitions between golf mode and regular room functions. With the right setup, your golf simulator can disappear into the background when not in use.
Pro tip: Consult with a smart home integration specialist to ensure your golf simulator automation system is compatible with your existing home technology ecosystem.
7. Maximize Lighting for Small Spaces
Lighting can make or break the functionality and atmosphere of a compact golf simulator room. Strategic illumination transforms limited spaces from cramped to comfortable and creates an immersive practice environment.
The goal is to select lighting solutions that enhance visibility without causing interference with your simulator’s sensors and projection systems. Indirect LED fixtures with adjustable brightness and color temperature provide the most versatile approach for small spaces.
Careful lighting placement is crucial in confined areas. Overhead lights should be positioned to minimize screen glare and shadow formations. Consider using dimmable ceiling mounted LEDs that can adapt to different activities from intense golf practice to casual room usage.
Strategic Lighting Techniques:
• Install adjustable LED ceiling fixtures
• Use indirect lighting sources
• Select dimmable color temperature systems
• Avoid direct light near projection screens
• Implement smart lighting controls
• Create layered lighting environments
Make your lighting work double duty by choosing fixtures that complement both your golf simulator setup and the room’s overall design aesthetic. Modern LED technology offers incredible flexibility in creating multipurpose spaces that look professional and feel welcoming.
Pro tip: Test your lighting setup with actual golf simulator equipment to ensure zero sensor interference and optimal visual clarity before final installation.
Below is a comprehensive table summarizing the key strategies and considerations for setting up a compact golf simulator as discussed in the article.
| Section | Highlights | Key Takeaways |
|---|---|---|
| Compact Simulator Setup | Examine room dimensions and use space-efficient equipment. Examples: portable launch monitors, shorter clubs. | Design the simulator to fit the defined space without sacrificing golf realism. |
| Multi-Use Room Layout | Incorporate retractable screens, adaptable furniture, and modular storage. | Ensure the room can function both as a simulator and a livable space. |
| Retractable Screens and Nets | Opt for motorized systems with durable materials that retract smoothly. | Quickly transition your space between a simulator setup and general usability. |
| Projectors and Sensors | Use short throw projectors and wall/ceiling-mounted equipment. | Maximize performance and minimize required space for functionality. |
| Storage Solutions | Employ custom, concealed, and modular storage designs. Examples: under-seat compartments, wall-mounted racks. | Efficiently organize equipment while maintaining accessibility. |
| Smart Home Features for Automation | Integrate motorized screens, lighting controls, and environmental systems. | Enhance usability and convenience using technology. |
| Optimized Lighting | Utilize LED fixtures with adjustable brightness and indirect lighting. | Maintain visibility and ensure optimal conditions for projection and sensor functionality. |
Transform Your Compact Golf Simulator with Expert Home Automation and Sound Solutions
Creating a space-saving home golf simulator involves overcoming challenges such as limited room dimensions, efficient equipment placement, and multi-use functionality. If you are struggling with designing a sleek setup that integrates retractable screens, smart lighting, and compact sensors without clutter, you are not alone. Key goals include optimizing your layout for flexibility, using motorized shades and screens, plus enhancing your experience with automated lighting and immersive audio systems.
At Atlanta Home Theater, we specialize in solving these exact problems. Our expert team crafts custom smart home solutions that seamlessly combine golf simulators with automated lighting and sound control to transform small spaces into high-performance, multi-functional environments. Discover tailored options like motorized retractable screens, voice-activated equipment control, and space-conscious audio setups that bring your golf simulator to life without sacrificing room style or utility.
Ready to elevate your golf simulator room with cutting-edge automation and sound design? Explore our Sound Advice Archives – Atlanta Home Theater for ideas and connect with our experts today. Visit Atlanta Home Theater to schedule your consultation and start transforming your space now.
Frequently Asked Questions
How can I choose a compact golf simulator setup for my home?
To choose a compact golf simulator setup, measure your available room dimensions, including width, depth, and ceiling height. Ensure you have at least 10 feet wide, 12 feet deep, and 8.5 feet high to accommodate a full swing, then select all-in-one systems and portable equipment that fit your space.
What are the best ways to optimize room layout for multi-use?
To optimize your room layout for multi-use, position your golf simulator setup off center or at an angle to free up floor space for other activities. Incorporate foldable furniture, portable hitting mats, and retractable screens to transition the space easily for various functions.
How do I install retractable screens in my golf simulator room?
To install retractable screens, choose high-quality motorized systems that can be mounted on the ceiling. Carefully measure your ceiling height and room dimensions before installation to ensure smooth deployment and optimal performance without interfering with your setup.
What projectors and sensors should I choose for limited spaces?
Select short throw projectors and camera-based launch monitors for limited spaces, as these technologies require minimal distance from the projection surface. Additionally, prioritize options that can be mounted close to walls or ceilings to save floor space while providing accurate tracking.
How can I create custom storage solutions for my golf simulator equipment?
To create custom storage solutions, utilize built-in cabinets, vertical wall mounting, and modular shelving that aligns with your equipment dimensions. Design storage components that are easy to access and blend into your room’s decor, helping maintain a clean and organized space.
What smart home features can enhance my golf simulator experience?
Incorporate smart home features like motorized screens, voice-activated controls, and smartphone-managed lighting to automate your golf simulator environment. These enhancements can greatly improve functionality and convenience, making transitions between activities seamless.