Adjusting your home’s lighting for movie nights or lively outdoor gatherings can feel like juggling endless choices. Smart lighting goes far beyond basic bulbs, offering homeowners custom solutions for comfort, ambiance, and energy savings. This guide explains how thoughtful lighting design and automation transform private cinemas and entertainment patios, bringing scenes to life with technology that adapts to both your routines and unique daylight.
Table of Contents
- Step 1: Assess Room Requirements And Lighting Goals
- Step 2: Select And Position Smart Lighting Devices
- Step 3: Program Custom Lighting Scenes For Each Activity
- Step 4: Integrate Controls For Seamless Automation
- Step 5: Test And Adjust Scenes For Perfect Ambiance
Quick Summary
| Key Takeaway | Explanation |
|---|---|
| 1. Assess Room Requirements First | Measure dimensions and note natural light to tailor lighting solutions effectively. |
| 2. Select Fixtures Strategically | Choose and position lighting based on room function and activity needs for optimal performance. |
| 3. Program Custom Lighting Scenes | Create specific scenes for activities to enhance ambiance and user experience. |
| 4. Implement Automated Controls | Use smart technology to automate lighting based on time, occupancy, and environmental changes. |
| 5. Test and Refine Your Scenes | Evaluate custom lighting under real usage conditions for comfort and adjust based on feedback. |
Step 1: Assess Room Requirements and Lighting Goals
Before you purchase any smart lighting system, you need to understand what your space actually requires. Assessing your room properly saves money and prevents costly mistakes down the road.
Start by measuring your room dimensions and noting the ceiling height. A 9-foot ceiling in your Atlanta home theater will need different lighting than a 12-foot commercial space. Natural light sources matter too, so document which windows face south, east, or north and how much sunlight enters throughout the day.
Identify your primary purpose for each room:
- Home cinema rooms need blackout capability and minimal reflective surfaces
- Outdoor entertainment areas require weather-resistant fixtures and adjustable brightness
- Living spaces benefit from layered lighting that transitions between activities
- Workspaces demand task lighting that reduces eye strain
Think about how you’ll actually use the space. Will your cinema stay dark most of the time, or do you need flexible lighting for social gatherings? Does your patio host evening parties or quiet morning coffee sessions? Your daily habits directly shape which lighting scenes you’ll create.
Next, assess the surfaces in your room. Dark paint absorbs light, while light-colored walls and ceilings reflect it. Glossy finishes create glare, and matte surfaces provide softer illumination. Understanding lighting automation controls helps you work with these surfaces effectively by adjusting brightness and color temperature accordingly.
Quantify your lighting needs using industry standards. Energy-efficient lighting design emphasizes lumen levels appropriate for each space, whether you’re lighting a home theater or an outdoor deck.
Document any existing electrical infrastructure. Where are your current outlets? Can your electrical panel handle additional automated lighting without upgrades? These practical details inform your installation budget and timeline.
Measure twice, light once. Taking time to assess your room properly prevents expensive rewiring and hardware replacements later.
Pro tip: Take photos of your room at different times of day, noting how natural light changes from morning to evening, so your lighting scenes can complement rather than fight against these natural shifts.
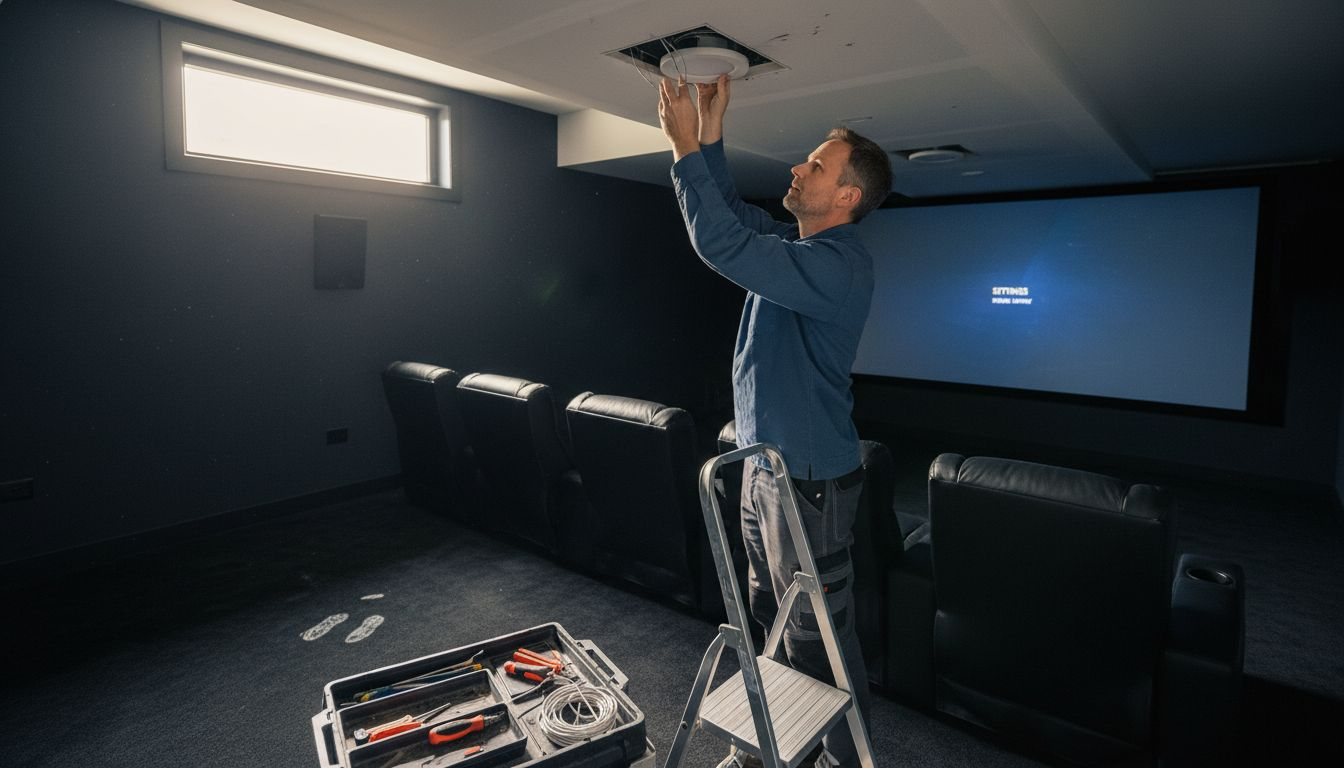
Step 2: Select and Position Smart Lighting Devices
Now that you understand your room’s needs, it’s time to choose the right fixtures and place them strategically. Smart lighting devices work best when positioned to layer natural and artificial light without creating harsh shadows or glare.
Start by mapping out your room’s zones. Your cinema needs concentrated light control in the seating area, while your outdoor patio benefits from distributed fixtures around the perimeter. Think about traffic patterns and where people naturally gather.
Select fixtures based on your specific needs:
- Recessed downlights work well for general ambient lighting in home theaters
- Wall sconces provide indirect light that reduces glare in living spaces
- LED strips offer flexible accent lighting along shelving or architectural features
- Outdoor fixtures must have weather-resistant ratings suitable for Atlanta’s humidity and occasional storms
Positioning matters as much as selection.Occupancy sensors and dimmers should be placed where they can detect movement accurately without false triggers from ceiling fans or passing shadows. Install dimmer switches at convenient access points, not hidden behind furniture.
For your home cinema, position lights to avoid screen reflections. Ceiling-mounted fixtures should angle away from the viewing area, and side wall lights work better than fixtures directly above seating. In outdoor spaces, consider how light spreads across your entertainment zones without spilling onto neighbors’ properties.
Layer your lighting by height and direction. Ceiling fixtures provide general illumination, wall-mounted fixtures add definition, and floor-level accent lights create atmosphere. This three-tier approach gives you flexibility when creating different scenes.

Consider color temperature positioning too. Warm white light works best near seating areas, while cooler tones suit task lighting in work zones. Mix fixture types to achieve balanced, comfortable illumination that supports smart lighting positioning best practices for residential spaces.
Here’s a quick comparison of fixture types for different smart lighting goals:
| Fixture Type | Best For | Typical Location |
|---|---|---|
| Recessed Downlights | Ambient light, broad coverage | Home theaters, living rooms |
| Wall Sconces | Reducing glare, accent light | Hallways, lounge areas |
| LED Strips | Flexible accent lighting | Shelving, feature walls |
| Outdoor Fixtures | Weather resistance, security | Patios, entryways |
Position first, connect later. Getting fixture placement right before installation saves you from expensive rewiring and poor lighting performance.
Pro tip: Use temporary lighting fixtures or smartphone flashlights held at fixture heights to preview how light will fall in your space before purchasing permanent equipment.
Step 3: Program Custom Lighting Scenes for Each Activity
Your smart lighting system becomes truly powerful when you program custom scenes tailored to different activities. A single button press or voice command can instantly shift your entire room’s ambiance from movie mode to dinner party mode.
Start by identifying the activities you perform in each space. Your cinema needs a scene that dims everything to near darkness with subtle accent lighting. Your outdoor patio needs a bright entertaining scene for guests and a softer scene for evening relaxation. Think through a typical week and list every activity that benefits from different lighting.
Create scenes for these common activities:
- Movie watching requires near-total darkness with minimal ambient light
- Entertaining guests calls for welcoming brightness with warm color temperatures
- Dining needs flattering light focused on the table, not the ceiling
- Morning routines benefit from cooler tones that promote alertness
- Nighttime relaxation works best with warm, dimmed lighting
Access your smart home app or control hub to begin programming. Most systems let you create a scene by adjusting brightness, color temperature, and individual fixture levels, then saving that configuration with a descriptive name. Configuring custom scenes with voice control integration lets you trigger scenes by saying simple commands like “Alexa, movie time” or “Google, dinner mode.”
Test each scene in real conditions. Visit your cinema at the actual time you’ll watch movies and verify the darkness level feels right. Test your patio scene during evening hours when guests typically arrive. Adjust brightness and color temperature based on how the lighting feels, not just how it looks on the app.
Group related scenes logically in your app for quick access. Keep scene names simple and action-oriented like “Movie” instead of “Cinematic Darkness Settings Number Two.” This makes voice commands easier and prevents confusion when guests ask you to adjust the lighting.
Test scenes when you’ll actually use them. A scene that looks perfect at noon may feel too dim or too cool when you’re hosting an evening party.
Pro tip: Start with three core scenes per room—one bright for daytime activities, one warm for entertaining, and one dim for relaxation—then add specialized scenes as you discover which adjustments make each activity more enjoyable.
Step 4: Integrate Controls for Seamless Automation
Connecting your lighting scenes to automated triggers transforms your smart home from manual to truly intelligent. You can now program your lights to respond to time, occupancy, daylight levels, or voice commands without lifting a finger.
Start by choosing your control hub or platform. Most smart lighting systems use a central app or voice assistant as the command center. Your hub communicates with all connected fixtures and sensors, allowing you to create automations that link multiple devices together.
Set up automation triggers for common scenarios:
- Time-based automations that activate scenes at specific hours (morning brightness at 6 a.m., evening dimming at 7 p.m.)
- Motion sensors that turn on patio lights when someone approaches
- Occupancy sensors that dim cinema lights when no movement is detected
- Daylight sensors that adjust brightness based on natural sunlight levels
- Voice commands that activate custom scenes with simple spoken phrases
Automation systems work by connecting sensors and lighting controls through integrated smart home technology that enables remote control and automatic responses. When your motion sensor detects activity on the patio, it signals the lighting controller to activate your “entertaining” scene. When daylight becomes abundant, your sensors reduce artificial light to save energy.
Link your outdoor lighting to weather conditions where possible. Atlanta’s summer sun differs dramatically from winter angles, so advanced systems can adjust brightness and color temperature seasonally.
Some platforms even sync with your calendar, so your home theater automatically dims when it detects a movie event scheduled.
Test automations thoroughly before relying on them completely. Verify that motion sensors trigger lights at the right sensitivity level, not falsely activating from passing cars. Check that time-based scenes activate at the correct hours in both daylight saving and standard time.
Integrate your lighting with whole-home systems for complete control across multiple rooms and entertainment zones. This unified approach lets you create synchronized lighting experiences that enhance both your cinema and outdoor spaces.
Automation should work invisibly. If you constantly override your automations, they need adjustment, not abandonment.
Pro tip: Create a “away from home” automation that dims all lights and activates security brightness settings to simulate occupancy, protecting your Atlanta home while using less energy than constant full brightness.
Step 5: Test and Adjust Scenes for Perfect Ambiance
Your lighting scenes are programmed, but perfection requires real-world testing. The way light feels when you’re actually using the space differs dramatically from adjusting sliders in an app during daylight.
Start testing each scene at the time of day when you’ll actually use it. Test your cinema scene at night when the room is dark and your eyes are adjusted. Test your entertaining scene during the late afternoon or early evening when guests typically arrive. This timing reveals how scenes interact with natural light and your body’s circadian rhythms.
Evaluate these key qualities for each scene:
Here’s a summary of key factors to test and adjust for the perfect smart lighting ambiance:
| Factor | Why It Matters | How to Check |
|---|---|---|
| Overall Brightness | Comfort for each activity | Use at actual time |
| Color Temperature | Sets mood and energy levels | Sample warm and cool |
| Glare and Shadows | Visual comfort, screen clarity | Observe from all seats |
| Light Distribution | Avoids dark spots, feels even | Walk entire space |
- Overall brightness that feels comfortable for the intended activity
- Color temperature that matches the mood you’re creating
- Absence of harsh shadows or glare on screens or work surfaces
- Even light distribution without dark corners or overly bright spots
- How light makes skin tones appear to you and your guests
Start with small adjustments rather than large changes. If a scene feels 10 percent too dim, raise brightness by just 5 percent and reassess. Tuning lighting controls for optimal comfort requires calibration that balances both energy efficiency and the ambiance you actually enjoy living in.
Invite guests to experience your scenes and gather feedback. What feels perfect to you might feel theatrical to visitors. Ask specifically about brightness level, warmth of the light, and whether they’d adjust anything.
Preferences vary, and good scenes work for most people without constant tweaking.
Test scenes across different seasons if possible. Winter’s low natural light angles differ from summer’s bright morning hours. Scenes that feel perfect in January might need adjustment by July as Atlanta’s daylight patterns shift dramatically.
Monitor how often you manually override your scenes. If you constantly adjust the brightness after a scene activates, that scene needs refinement. This feedback tells you exactly which settings aren’t matching your actual preferences.
Perfect lighting can’t be rushed. Spend at least two weeks living with your scenes before considering them final.
Pro tip: Keep a simple notebook near your most-used switches where you jot down adjustments as you notice them, so you can make all changes at once rather than constantly fine-tuning individual scenes.
Enhance Your Smart Home Lighting with Expert Guidance
Setting up the perfect lighting scenes for smart homes and cinemas can feel overwhelming. The article highlights challenges like positioning fixtures to avoid glare, programming customizable scenes for every activity, and integrating automation that works seamlessly without constant manual override. If you are striving for a balanced ambiance where brightness, color temperature, and automation perfectly align with your lifestyle, you know how crucial it is to get professional support that understands these nuances.
At Atlanta Home Theater, we specialize in transforming these complex smart lighting goals into effortless experiences. Our team of over 40 highly trained professionals has been providing custom private cinema and smart home solutions since 1996. We offer tailored automated lighting systems designed to complement your entire home environment, whether it is a dedicated home theater, outdoor entertainment space, or a whole-home integration. Explore how our expertise in lighting automation controls and whole-home integration can bring your smart lighting vision to life with precision and style.
Ready to eliminate guesswork and create lighting scenes that enhance every moment? Schedule your consultation today at Atlanta Home Theater and experience personalized guidance that ensures your smart home lighting works perfectly for you.
Frequently Asked Questions
How do I assess my room’s lighting requirements for smart home setups?
To assess your room’s lighting requirements, measure the dimensions and note the ceiling height, as well as existing natural light sources. Document the primary purpose of each room and how you’ll use the space to determine the best lighting scenes.
What types of smart lighting fixtures should I choose for a cinema?
For a home cinema, opt for recessed downlights that provide ambient lighting without creating reflections on the screen. Position these fixtures to avoid direct glare from screens and ensure an immersive viewing experience.
How can I program custom lighting scenes for different activities?
To program custom lighting scenes, identify the activities you perform in each space and create scenes that reflect the desired ambiance, such as dim lighting for movies or bright lighting for dinners. Use your smart home app to adjust brightness and save these settings under clear, descriptive names.
What automation triggers can I set up for my smart lighting?
You can set up automation triggers based on time, occupancy, or even daylight levels to enhance your smart lighting experience. For example, program your lights to dim automatically at 7 p.m. to prepare for evening relaxation or movie-watching.
How should I test and adjust my lighting scenes?
To test and adjust your lighting scenes, evaluate each one during the actual times you plan to use them, monitoring factors like brightness and color temperature. Make small adjustments and gather feedback from guests to refine the scenes over time, allowing for an ideal ambiance.
What is the best way to layer lighting for different spaces in my home?
Layer your lighting by using a mix of fixture types at varying heights and directions, such as ceiling fixtures for ambient light and floor fixtures for accent light. Focus on creating balanced illumination without harsh shadows, tailoring the approach to the specific needs of each room.